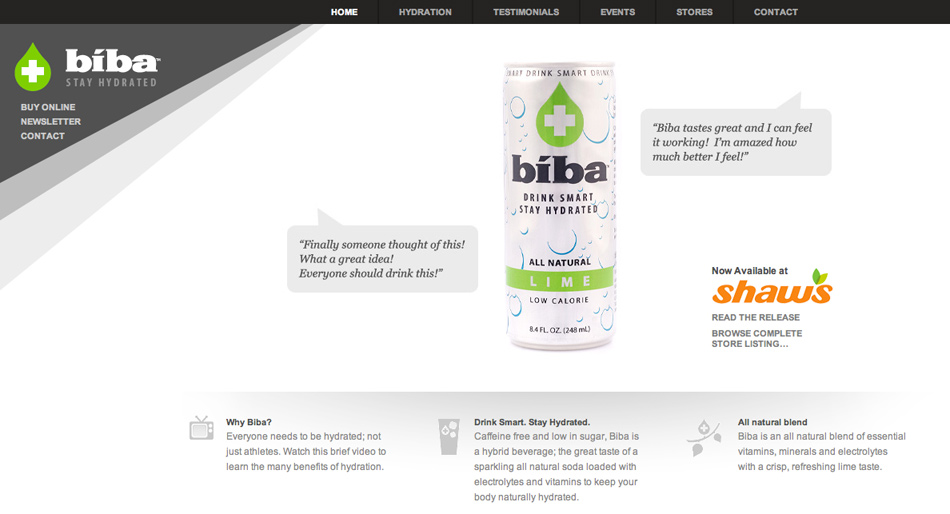
I love this….one of my clients is making it big. Biba, a health “smart drink” startup based in Boston, is now in full production after a couple years of very hard work. I just noticed them in the local grocery store, too. Biba is hands-down the best energy-type drink I’ve ever had—light, full of vitamins rather than sugar, and darned tasty. Go Biba!
Category Blog
Lights on Location Workshop

It’s now October, which means that it’s time to start thinking about holidays, jackets and how to escape the coming cold. It also means the final workshop of our 2011 series is almost upon us.
The Lights on Location Workshop is slated for 4-7:30 pm on Tuesday, October 18th at Ferry Beach in Scarborough. This is a hands-on-cameras workshop focused on real, practical shooting with strobes (studio and speedlight) in combination with sunlight outside.
If you’ve ever struggled with portraits on the beach, or getting a great fashion style shot, this workshop is for you. We’ll be shooting in full sunlight and at dusk using studio strobes with battery packs and with speed lights, with a variety of light modifiers.
The goal is to give you confidence that you can balance natural with artificial light to make a stunning, dramatic image for your portfolio or for your clients.
I love gear as much as the next photographer, but the focus here is unleashing your creativity. As such we’ll delve into light basics, lighting with just one or two lights, high-speed flash photography, and maximizing the effectiveness of your camera manufacturer speed lights. The focus is on maximizing the gear you already own, but we’ll show examples using more lights and some more sophisticated lighting controls.
To sign up for the workshop, click to pay here. Space is limited to just 10 participants. Hope to see you there!
Introducing…Inspire Portland
Five years ago, my wife Beth and I drove 3,090 miles from Washington State to Portland, Maine. I had recently been transferred by my employer, the Seattle Times Company, to become the photo director at the Portland Press Herald/Maine Sunday Telegram.
In my career as a journalist, I’ve lived a lot of places but the goal was always the same: to make my mark at the newspaper, and when it was time, move on. It never really mattered where I lived, from Korea to Yakima, Washington, but Portland was different. We were as excited about our new hometown as I was about the new job.
After a couple of years I decided to leave the newspaper to focus on my photography business. We were faced with a decision: stay in Portland, or move again.
We chose Portland.
Almost everyone, it seems, has had to ‘choose’ Portland at some point. From the 20-something working several ‘joblets’, to the entrepreneur who decides they’ll build a business here, almost everyone, at some point, has to make a decision whether to stay. Portland isn’t made up of people who just end up here—this isn’t Phoenix or Florida or L.A. The winters are hard and long, and jobs can be scarce. It’s a place where, to succeed, you have to work hard and be creative. Not surprisingly, it’s filled with some pretty interesting, driven and creative people.
Which brings me to Inspire Portland. Years ago, our family decided to live, work and play in Portland. Inspire Portland is a sampling of people—people you may know about, and people that you should. This site is based on my desire to get out on the streets with my camera and talk with people who make Portland such a cool place. Every other week I’ll feature a new portrait along with a short question-and-answer session. That’s 26 portraits and interviews of some pretty cool people that have inspired Portland.
On this blog, I’ll announce each ‘issue’, tell the backstory for the portrait and may publish additional photos from the shoots. The project kicks off with three portraits dating from September 1.
The first portrait is of Rich Connor, CEO and Publisher of MaineToday Media. I start with him because our paths are intertwined—The Press Herald is what brought me to Portland. It hasn’t been that long since national media ran articles about how Portland was on the verge of losing its only daily (non-free) newspaper. Connor is responsible for the paper’s continued survival during a very difficult time for newspapers. Next up is Nan Heald, executive director for Pine Tree Legal Assistance. Through an army of volunteer laywers, the PTLA has changed lives for the better here. I end September with Chystie Corns, who takes the idea of ‘invent your dream job’ to a whole new level. Her talent is that she makes it look so easy.
Let me know what you think.
Just in time for Halloween….
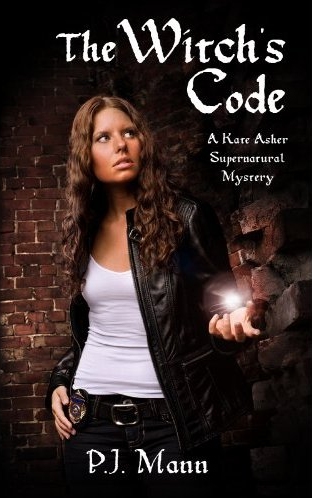
I recently had a fun shoot for an e-book project called The Witch’s Code by author P.J. Mann. Earlier this week, the book was published for sale online, so I thought I’d share the cover as well as some photos that didn’t make the final cut. This is the first time I’ve gotten to work directly with my good friends Arielle Walrath, Kevin Brooks and Sean Wilkinson of Might & Main. As it turns out, after searching for an appropriate model who also would fit the author’s well-defined notions of the main character (uh, let’s see…a 20-something female detective from Salem, Mass., with wavy long brown hair, who can channel her inner witch….). After everything was said and done, it turned out that Laura Flood —my makeup and hair stylist of choice—was perfect (and willing, which was definitely a plus). I also have to thank South Portland P.D.’s Steve Webster (a bona fide real detective) for his expertise and help as well.
The finished cover, with post-production provided by Might & Main is pretty cool–definitely my favorite photo of the bunch. Here are a couple of others I liked a lot (Laura is holding her hand out as if it contains a glowing spell as in the final finished book cover). Great job all around, and a way fun shoot on location in the bewitching city of Portland.
[photoshelter-gallery g_id=’G0000MQ6.CZKhtiw’ g_name=’Witch-Code’ f_show_slidenum=’t’ img_title=’casc’ pho_credit=’iptc’ f_link=’t’ f_send_to_friend_btn=’t’ f_fullscreen=’t’ f_topbar=’t’ f_bbar=’t’ f_show_watermark=’t’ f_htmllinks=’t’ f_mtrx=’t’ fsvis=’f’ width=’600′ height=’550′ bgcolor=’#AAAAAA’ btype=’new’ bcolor=’FF0000′ crop=’f’ twoup=’t’ trans=’xfade’ tbs=’5000′ bgtrans=’f’ linkdest=’c’ f_constrain=’f’ f_bbarbig=” f_enable_embed_btn=’f’ f_show_caption=’f’ f_smooth=’f’ f_ap=’f’ f_up=’f’ target=’_self’ ]
Ebook photography
I’ve had the pleasure this year of working on projects for several authors (both traditional print and e-book). Several were environmental portraits of the authors themselves—shot on location—for their printed book projects. The third is a conceptual image for an established author who is branching out into a series of e-books.
Whether for traditional, physical books printed on paper or those destined exclusively for ebook readers, these types of images need to be impactful and must fit the genre and author’s personality. A couple of the authors are career emergency services workers, so a certain grittiness was called for due to the subject matter—namely crime scenes and emergency calls.
The E-book, a Twilight-esque fiction novel, was all about a striking image—in this case sexy but dark—that would get the attention of potential readers. I’ll show that image when it’s actually published and the book’s for sale. Now that Border’s gone, you’ll need to get your books somewhere…
[photoshelter-img width=’400′ height=’621′ i_id=’I0000MhChkU_4m0o’ buy=’0′]
Your photos are being used illegally. Now what?
Last year I wrote about the importance of copyright registration. Recently this practice helped me both protect against—and collect for—unauthorized use.
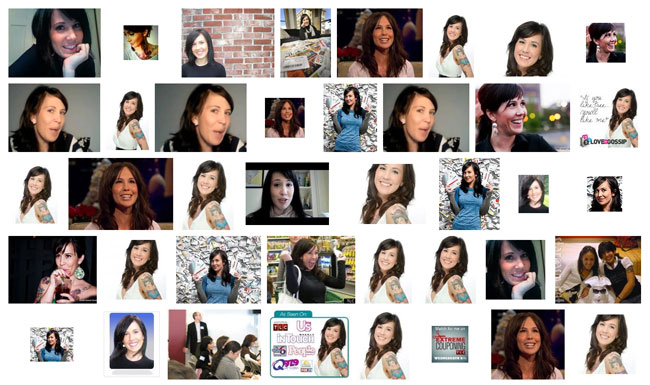
Last spring, I photographed local celebrity and Extreme Couponer Chrystie Corns. For those who don’t know, Chrystie is the sister of Ashley Hebert, this past season’s star of the Bachelorette reality tv show. As her outspoken sister, Chrystie was featured prominently on the season finale. I’ve photographed Chrystie a couple of times now and she’s been nothing but gracious and kind.
The morning after the show’s airing, I noticed huge spikes in traffic on my blog post on Chrystie. I started doing some Google searches and came up with several sites—including prominent news sites—using my photo of Chrystie without permission and minus my watermark (clearly visible in my published photo) cropped out. This is a clear violation of my copyright, the terms on my site and was done without my or Chrystie’s knowledge or consent.
So, what’s a photographer to do? It may be enough to contact violators and letting them know that you are the copyright holder. It has a lot more weight behind it if you’ve actually registered your images with the US Copyright Office and gotten proof (the registration certificate) back in the mail. Coincidentally, I got this certificate just three days before the final Bachelorette aired (though I had registered the images months before, it took a while for the request to process).
Photographers can collect only actual damages (hard to assess, but certainly not amounting to much in the age of digital) for a proven copyright infringement. If the image is officially registered, statutory damages up to $150,000 may be awarded. That’s the kind of consequence that gets people to stand up and pay attention.
Another helpful—make that necessary thing—is a well-crafted cease-and-desist letter, written by an attorney. I have one that I use in such cases as the first salvo. The second, if necessary, comes directly from my lawyer.
In this case, it took me more than two weeks to chase down and get responses back from all the infringers (there are also legitimate users, approved by Chrystie and allowed based on our license agreement). In the end, I got immediate take-downs in all cases and an agreement to pay from one site that turned out to be the place many of the others got my photo from. They are also the ones who cropped my watermark out, incidentally.
Some people may ask why I as a photographer care, or wonder if it’s about making more money for the photographer. I answer that my primary purpose isn’t to get abusers to pay, it’s to stop the infringement, both to protect my copyright and my client (the subject of my photos). I will invoice them if they’ve already gotten use out of the image for which they’d normally have to pay but I won’t press the issue usually if they respond quickly and decisively to my notification.
A side note: I got one polite response from a news site apologizing for their use, and stating that they take copyright violation ‘very seriously’. They mentioned that they had done a Google images search and that the license indicated it was a royalty free image. I’ll take them at their word that they are apologetic, but when I searched on Google Images filtering only for “free” images, my image did not come up.
For added protection and tracking of my images, I’m currently in the process of incorporating the Plus registry into my workflow.
So, even if you shoot subject matter that you may not think will require the level of protection needed and afforded by us copyright registration, it’s worthwhile to prepare yourself now before you’re tested.
Know your rights, and register, register, register. It’ll be the best $35 you ever spent.
[photoshelter-img width=’250′ height=’400′ i_id=’I0000eSeUn8UIvxs’ buy=’0′]
Use the web to find your stolen camera gear
Professional photographers are familiar with insurance, which protects expensive gear from loss or damage. But if you’ve ever had gear stolen, you know that while replacing it is obviously nice, nothing beats actually nabbing the crooks responsible.
Using a free online tool called GadgetTrak, you may be able to do just that.
How does it work? Once you submit your camera serial number, the site searches the web for images published with that serial number embedded in the EXIF metadata that resides inside the image file. If you’re lucky, they’ll return images taken by your camera. That’s what happened to LA photographer John Heller, who was able to recover more than $9000 worth of stolen camera equipment using this online tool (see video, below).
The state of (ME) sales tax and your photography business
Collection of sales tax is one of those things that photographers should be charging but may not be charging correctly. This is because it can be hard to find information online, because each state approaches the issue differently and because as photographers we may (or may not) deal with things like prints, electronic image delivery, sitting fees, out of state clients and license and usage fees. It can be very confusing.
I’ve directly contacted the state of Maine in the past to ask questions about sales tax, and have had many discussions with other local photographers including Kathleen Kelly, a Scarborough-based commercial photographer who has gotten answers from the state. Recently I corresponded with a tax section manager, Peter, from Maine Revenue Services regarding my most oft-seen scenarios.
His responses revealed a few surprises. I’ll explain further, but must note that I’m not a lawyer or a tax professional. You should hire a good CPA to handle your business taxes and if you have further questions, contact the state directly.
First, some things I already knew: I don’t charge tax to my out-of-state clients, but I do to my in-state ones. Sometimes I don’t charge tax as a separate line-item to clients in-state. In these cases I’m still required to pay the state the appropriate state sales tax. Electronic file delivery is considered a tangible product, just like a CD of images or a box of prints. It’s taxable.
If you charge usage or license fees, however, it gets interesting. If your license is unlimited in terms of time, then it’s subject to tax. If your license is restricted to ten years or less, it’s not subject to state tax. This is a recent decision on the part of the state of Maine to treat photography licensing like software licensing. Note that they use a length of time (10 years), not type of use (brochures, web, etc) to define the restriction.
A couple of things to make sure of: Make sure to apply sales tax to line items in your invoices. Things like postage using common carriers (USPS, FedEx, UPS) are not taxable. Reimbursed expenses aren’t either.
As always, consult a professional when deciding how to approach state sales tax, and actively seek answers that pertain to your specific situation. remember that just because you didn’t know the right way to go doesn’t make you immune from being held responsible by the state later.
I have my digital files…now what?
[photoshelter-img width=’500′ height=’352′ i_id=’I0000w85MS3SOAJM’ buy=’0′]
I get the feeling my corporate and entrepreneur clients are thinking this when I’ve delivered a job to them.
My deliverables may include DVDs of high-resolution images, a “READ ME” file explaining color space, file format, etc, and pdf contact sheets. Beyond that, I often post images in a protected gallery on Photoshelter, my online image library. Each file I deliver is typically a high-resolution, 300 dpi color file, saved either as .jpg (compressed) or a .tif (uncompressed). Think of it as a master file. From this high-quality original file, clients can output the image in a variety of ways for specific uses including:
- Newsprint: Most newspapers have a line screen of 100 lpi (lines per inch) or less. Double this number to get the necessary resolution, or dpi (dots per inch). In addition, newspapers are printed on an offset press that uses four colors, so ideally you’d convert your file’s color space from RGB to CYMK. Reds, blues and other colors can dramatically be altered during this conversion process, which may require additional imaging work to recover the brilliance and colors of the original image. Lastly, because newsprint absorbs ink, photos destined for a newspaper require quite a bit of sharpening (much more than a print on photo paper) in order to look clear, sharp and bright in your average newspaper. Most newspapers will accept any kind of high-resolution digital file, and then do all of this work for you. If you want to make sure it’s correct, we can do it as well.
- Photo Prints: Most pro labs require resolutions of 240-300 dpi, so your image will automatically work great for that. To really make it pop, it’s good to do a little bit of sharpening to your image. It’s also useful to soft-proof the image on a color-calibrated monitor–ideally after embedding the correct .icc color profile built for the specific printer you’re using. These are available often from the printer themselves, or you can download them here: Dry Creek Photo.
- Web: Since the web is viewed on machines and screens of all types, it’s not impossible to make your image look great on every one of them. Make sure you have a fighting chance by converting your file to the sRGB color space, or otherwise it may look too yellow or magenta on PC screens.
- Black and White: If your image needs to be turned black and white, you could just do an automatic grayscale conversion in Photoshop or even in free editors like iPhoto and Picasa. It’ll work, but it’s not optimum. My preferred way is a multi-step process that preserves detail in shadow areas and gives a much richer tone to the finished black and white image.
- Upsampling: If you need to make a print that is physically larger than the size of the digital image, you have a few choices. You can resize the image to the larger size, but if it’s more than 10% larger than the original you’ll get pixelation and softness. Again, I use special software to upsample the images to larger sizes in a way that preserves the image’s integrity as much as possible. Keep in mind that when you size a photo up, you’re asking the software to add more pixels. These have to come from somewhere, so basically the software takes a look at the color of the existing pixels and makes an educated guess about what color pixels to add to generate the larger-size photo. Depending on the sophistication of the software, this can be done well or very badly.
It can be daunting when you aren’t sure exactly how to use the image files in an optimum way for each specific application, be it web, newsprint, photo print or other. Knowing how you’ll use your images, and communicating that to your designer, photographer or programmer , is key to your success. As part of my service, I’m happy to help my clients optimize their images for use in magazines or the web.
Lose the gear and become a better photographer
But with experience comes the realization that a great photograph has less—much less—to do with fancy gear or expensive equipment and much more to do with what’s going on with the person behind the camera.
In short, it ain’t about the tools you use. It’s how you use them.
When I first learned how to use studio lights on location, I was so excited to bring out my lights and stands, position the subject, etc. I would spend a lot of time worrying about details like exposure and light shaping and correspondingly less time engaging with my subject. Invariably, the result looked technically sound but lacked soul.
On the other end of the scale were the seat-of-your-pants moments as a newspaper photojournalist. With just two cameras, a couple of lenses and a flash I was able to focus on capturing the moment. Sometimes the photos were grainy, or were shot in less than ideal lighting conditions, but the content and moment elevated them far beyond the realm of the average “pretty picture”.
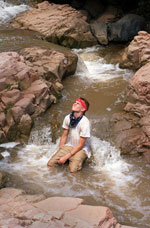
Once I did a week-long assignment covering a wilderness teen camp–you know, the type of program where troubled, out-of-control teens are whisked away in the night to find themselves deep in the wild, learning discipline through hard work and routine for weeks or months on end. This one was isolated in a remote area of high Arizona desert, and everything I needed was packed on my back for the daily marches to each night’s new camping spot. Within an hour of hiking, I slipped while fording a river, dunking a camera, a lens and smashing another on a rock. I shot everything for the next five days with a backup Nikon FM2, a 24mm and a 35-70mm lens while the wet gear rusted inside a plastic bag.
And the photos were great. Limiting myself to a couple of lenses and a single camera body helped me focus on getting the moment, gave me less distracting choices and ended up helping me get a very strong photo story. I also learned to start a fire with a bow and stick, but that’s another story.

