This is the first in a regular series I’m calling ‘Shop Talk’. Basically, it’s a response to some of the questions I get, both from other photographers, friends…and our intern, Stepheney. Most of the tips will be Photoshop oriented, but they will also relate to workflow, archiving of image files, and other software that I use in my daily business as a Maine commercial photographer.
Let me repeat: I’m not an expert. But I do make a living at this, and have a particular perspective that may be of use.
So, let’s dive right in.
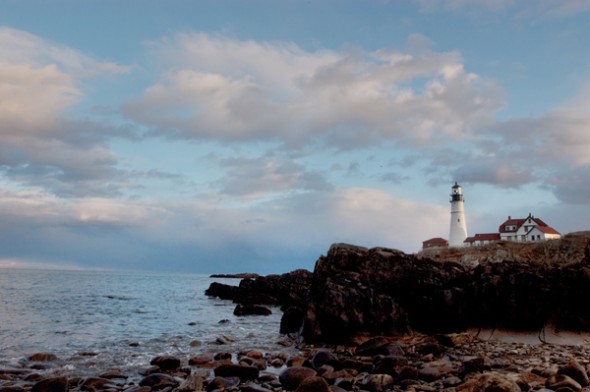
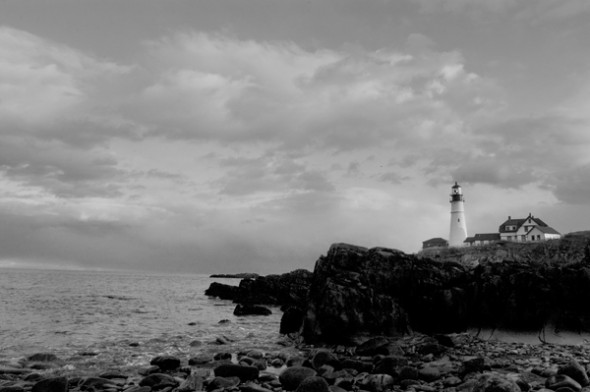
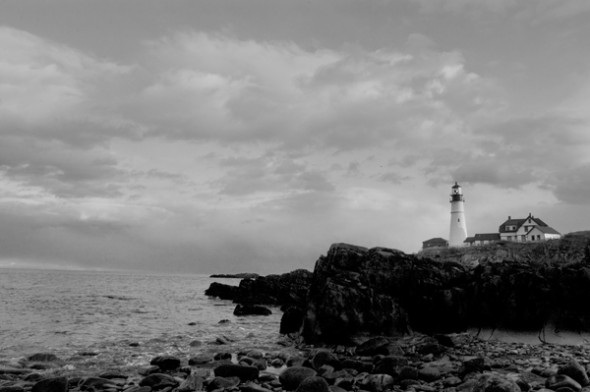
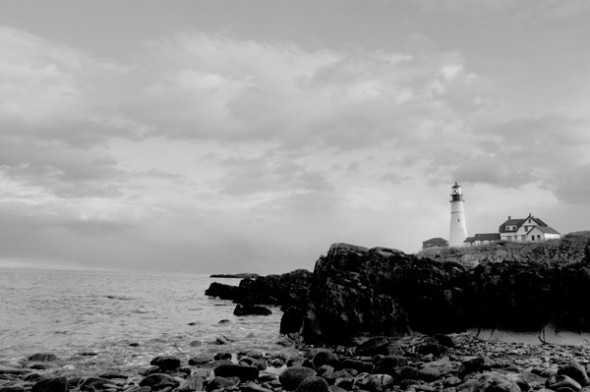
I had a shoot last week that specified delivery of Black and White images instead of color. It seems everyone has a different method for black and white conversions. It matters how you do it since each method tends to have a different effect on the final image. So, below, are two common methods–straight Photoshop grayscale conversion and desaturation–and the one I use, via Lab Color conversion. Check out the photos of a lighthouse with lots of shadow area to see the results.
Method Number One: Shoot your photo in black and white. Yes, your DSLR will allow you to shoot a black and white photo. If you’re a purist, with a bagful of #15 and #25 filters, you might want to shoot in black and white so that you can use various filters for great effects in-camera. Otherwise, it makes sense to shoot in color so you have more options down the road. Why let your camera do the auto conversion from color to black and white when you have a big, powerful computer–with a big, powerful Adobe Photoshop program to do a custom conversion? OK….maybe you don’t have either of those two things, and so in that case, flip that switch and go black and white. Otherwise, don’t.
Method Number Two: Automatic GrayScale conversion

In Photoshop CS4, you can go to the Image–>Adjustments–>Black and White area of your toolbar and convert any color image to grayscale. The process is automatic, and looks pretty good right out of the chute. Why wouldn’t you do this? Better investigate further…..
Method Number Two: Desaturate

To Desaturate, open your image and then go to Image–>Adjustments–>Desaturate. Wow. It looks pretty good, too, but if you look closely you’ll notice that it looks a bit muddier than the straight grayscale conversion above. The whites aren’t so crisp and white, and the grays are a bit muddier. Ok in a pinch, but still not great….
Method Number Three: Lab Color conversion

This is the one that I use. I first learned about it from a workshop put on by digital photo pioneer Rob Galbraith, and I hear references from time to time about others using it as well. For my money, it results in detail in shadow areas and looks like it maintains more shades of gray (for you Ansel Adams enthusiasts, this one will get you zones one through five). Note: Make sure that if you use this or the Grayscale method that you convert to a color space. Why? Because your image will look pretty messed up if you try to print it without it being considered a “color” image. You’re just applying a color profile (like sRGB) to the black and white file, which has had all the color info stripped away. The photo will still look black and white.
That’s it. Hope it helps some of you. I’d love to hear other methods you use to get from color to black and white. Next week: Sharpening (the other way).
(BF: Somehow the actual ‘how to’ part of this tutorial got missed, so here goes. To convert to black and white via Lab Color:
- Go to Edit–>Convert to Profile
- Choose Lab Color and click OK
- Go to the Channels Palette and click/drag either the A or B channel to the little trash can icon at the bottom of the palette (trashing one will trash the other automatically)
- Now go to Image->Grayscale to convert to Grayscale
- If printing, go back to Edit–>Convert to Profile and select an RGB profile (I use sRGB)
That’s it!)
