With Photoshop, it’s easy to go overboard and end up with the equivalent of what we used to call the Hand of God effect. Any change made to an image alters the bits that make up the file and cannot be reversed once done.
That’s why I love Photoshop’s nondestructive imaging capability using Adjustment Layers. The idea is that when you make changes to an image, you do so on a separate layer. This means you don’t make changes to the underlying image file (the background layer) at all, and thus don’t damage the original. Once you’ve got the file where you want it, you flatten it and make all the changes all at once.
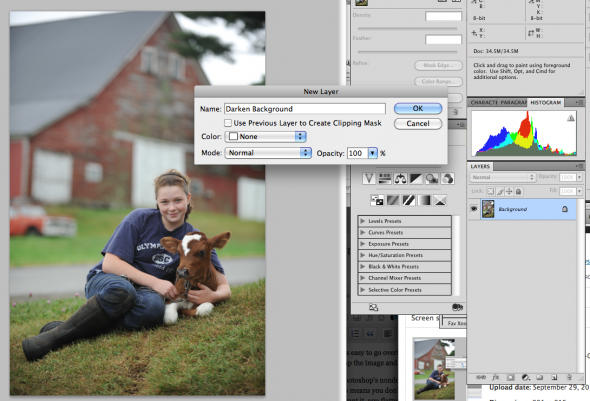
Adjustment layers are a great idea, and are easy to use. With an image open, go to Layers–> Adjustment Layers. You’ll have the option to choose tools such as curves, levels, exposure etc. When you select a tool and name the layer, you can make changes with the tool that appear to change your image (below).

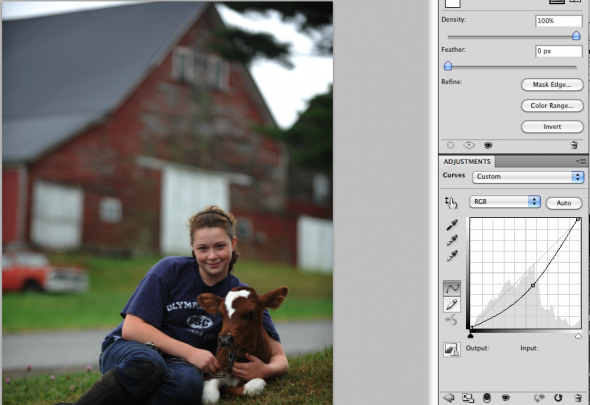
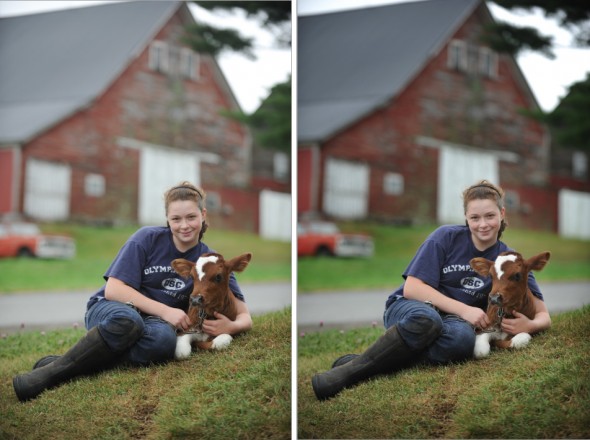
The change is really only being applied to the adjustment layer, which you can see in your Layers palette. If one portion of the photo is too bright and I want to darken it, as in my example below, I make the entire photo darker using Curves.

Then I make sure the black square at the bottom of the tool box is set as foreground color (click the two-headed arrow to move the black box above the white one as shown below), and I select the paintbrush tool . Now when I paint areas of the photo with the brush, I’m actually telling it to remove the darkness I’ve just added to that portion of the image. In my example, I only want the sky and background to be darker–not the girl. So I carefully paint around her, varying the brush size and opacity to feather in the changes so they look natural.

If you mistakenly take away too much with the paintbrush, or wander over areas of the image you don’t intend to, you can use the Undo (command + Z) tool to undo the change, or–and this is why I like Adjustment Layers so much–you can add the change back. You do this by going to the bottom of the toolbar and making the white box set as the foreground color. This now means that whichever area you paint, you are adding back the changes you made to the adjustment layer (in this case, adding the darkness I applied in step one). So by alternating the additive (white) and subtractive (black) versions of the paintbrush, I can really craft my adjustments.
There’s no limit to the number of Adjustment Layers you can layer, one on top of the other. If you don’t like what’s going on with one of your layers, you can always drag that layer (in the layers dialog box) into the trash can and deleting it.
When you’re all done, it’s a good idea to save the entire file as a “master” version of the image–either as a .psd or a .tiff–preserving all the individual layers as they are. Then, flatten the whole thing to produce your final usable file. Once you incorporate Adjustment Layers into your workflow, you’ll save time and have better results.

