Posts tagged Shop Talk

Expand your mind (and your Mac) with hard drive enclosures

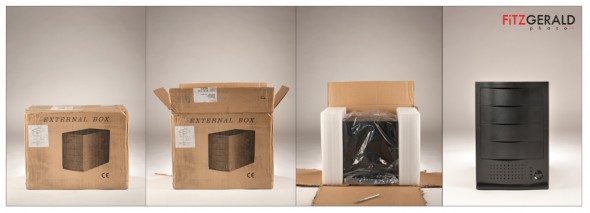
A present to ourselves: the indestructible Burly Box from MacGurus (click image to view larger photo)

I’ve written before about the need to have a 3-2-1 backup system for your important image files. Now here’s a great tool that makes automating backups, cloning and file transfers a snap: a multiple-bay hard drive enclosure. Whether you have a multiple-drive war horse or are using an iMac or laptop, if you’re a photographer you probably should look into one of these. This particular unit is sold by the knowledgeable folks at MacGurus.  When I called, the guy who helped was Rick, the owner.

I chose a four-bay unit so that my primary copies of my archive as well as backups and system clones could happen in one place. The unit is extremely tough and comes with robust power and cooling systems, so it’s meant to be run–as you might expect–all the time. This “always-on” approach solves the issue many photographers face who have a good backup system in place that may not get consistently applied because hard drives aren’t always plugged in and attached to the computer.

Ours arrived this week, and so it was fun to just light it and open it the opposite way that I opened presents as a kid: sloooowly.  More on software recommendations for handling automatic processes soon.

Shop Talk: Using Adjustment Layers

With Photoshop, it’s easy to go overboard and end up with the equivalent of what we used to call the Hand of God effect.    Any change made to an image alters the bits that make up the file and cannot be reversed once done.

That’s why I love Photoshop’s nondestructive imaging capability using Adjustment Layers.  The idea is that when you make changes to an image, you do so on a separate layer.  This means you don’t make changes to the underlying image file (the background layer) at all, and thus don’t damage the original.  Once you’ve got the file where you want it, you flatten it and make all the changes all at once.

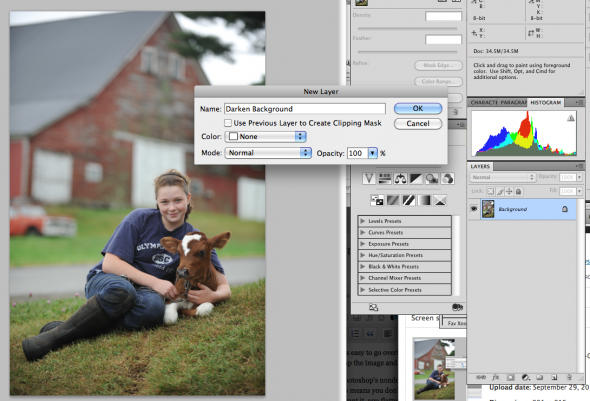
Adjustment layers are a great idea, and are easy to use.  With an image open, go to Layers–> Adjustment Layers.   You’ll have the option to choose tools such as  curves, levels, exposure etc.  When you select a tool and name the layer, you can make changes with the tool that appear to change your image (below).


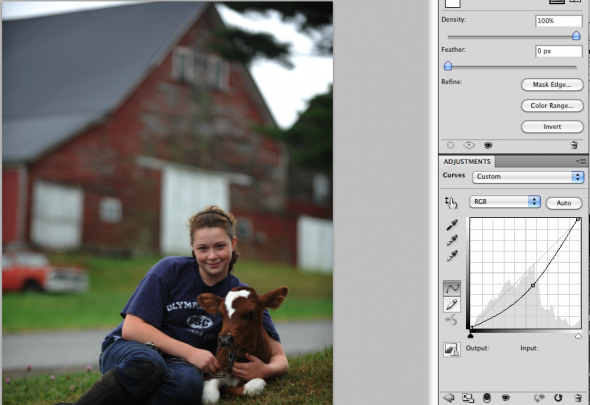
The change is really only being applied to the adjustment layer, which you can see in your Layers palette.  If one portion of the photo is too bright and I want to darken it, as in my example below, I make the entire photo darker using Curves.

Then I make sure the black square at the bottom of the tool box is set as foreground color (click the two-headed arrow to move the black box above the white one as shown below), and I select the paintbrush tool .  Now when I paint areas of the photo with the brush, I’m actually telling it to remove the darkness I’ve just added to that portion of the image.  In my example, I only want the sky and background to be darker–not the girl.  So I carefully paint around her, varying the brush size and opacity to feather in the changes so they look natural.

If you mistakenly take away too much with the paintbrush, or wander over areas of the image you don’t intend to, you can use the Undo (command + Z) tool to undo the change, or–and this is why I like Adjustment Layers so much–you can add the change back.  You do this by going to the bottom of the toolbar and making the white box set as the foreground color.  This now means that whichever area you paint, you are adding back the changes you made to the adjustment layer (in this case, adding the darkness I applied in step one).  So by alternating the additive (white) and subtractive (black) versions of the paintbrush, I can really craft my adjustments.

There’s no limit to the number of Adjustment Layers you can layer, one on top of the other.  If you don’t like what’s going on with one of your layers, you can always drag that layer (in the layers dialog box) into the trash can and deleting it.

When you’re all done, it’s a good idea to save the entire file as a “master” version of the image–either as a .psd or a .tiff–preserving all the individual layers as they are.   Then, flatten the whole thing to produce your final usable file.  Once you incorporate Adjustment Layers into your workflow, you’ll save time and have better results.

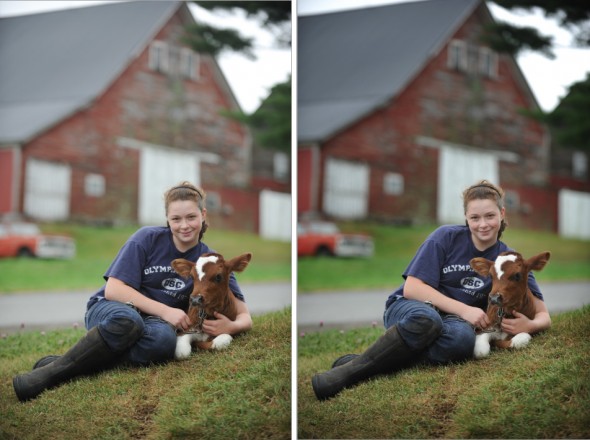
Original image, left and final image after flattening.

Shop Talk: What space are you in?

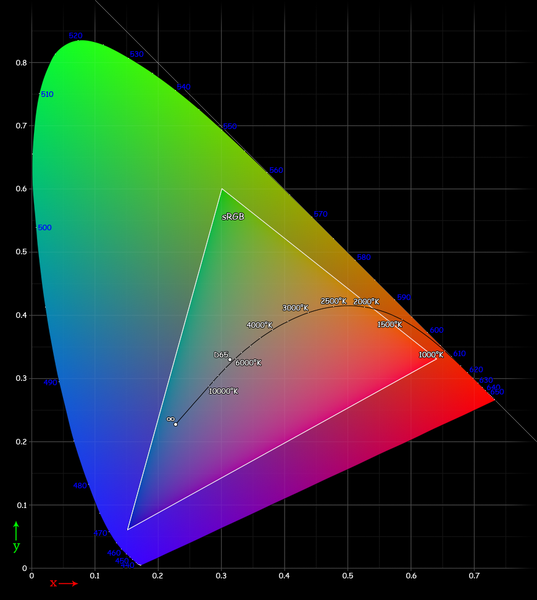
CIE Chart with sRGB Gamut by spigget.png
CIE Chart with sRGB Gamut (from Wikimedia Commons)

When you get a new digital camera, one of the bewildering number of options available to you in set up is to change the color space:  sRGB, Adobe 1998, or even ProPhoto RGB (only certain cameras).  Each of these has a wider color gamut than the last.  That’s a fancy way to say that they can see many more colors–and thus produce an image with more of the hue subtlety that nature offers.

Then there’s the color space, known as the working color space, that you use when processing an image in Photoshop.  This usually is the color space that the image came in, but you can assign a new working color space just for the purposes of your particular monitor, etc.   More on that in a future post.

Finally, there’s the output color space–the space that you convert your image to just before turning that image out for a client, a printer or for publication on a site.

No matter what color space your image is assigned in-camera or in your photo editing program, make sure to consider converting your image to sRGB if it is intended for web display, for printing at a photo lab or if it is being sent to a client who has a PC (when in doubt, assume the viewer’s computer is a PC!).

Why?  sRGB displays a more limited set of colors, but it’s a color space made for PC screens–and most computers out there are PCs, not 27-inch calibrated Mac screens like mine.

To convert an image to a new color space in Photoshop, go to Edit–>Convert to Profile and choose the sRGB option from the drop-down menu.  If you use Lightroom or other programs, many of them have an “convert to sRGB” option when exporting images.

Paying attention to the color space your photos are captured in and imaged in is important, but it’s equally important to convert to sRGB unless you know that your images are going to an offset printer (CMYK color space) or to someone who has a nice, big Mac computer just like you.  Your images will display better and your clients will be happier, too.