Add Adjustment Layers to the long stack of reasons why Adobe Photoshop is my go-to image editing software. Most photographers are used to the idea of adjusting their images using tools like Curves, Levels and Brightness/Contrast. You can directly adjust your images in a variety of ways using these tools.
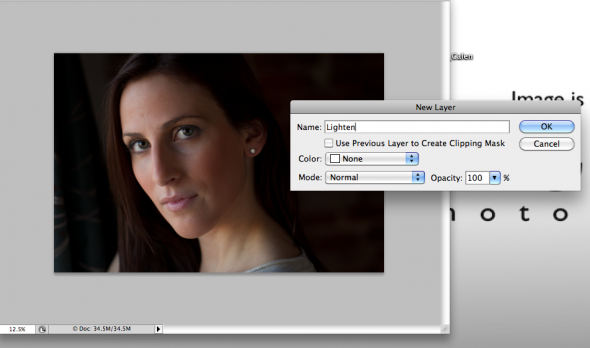
Next time, use the Adjustment Layer versions of these tools (Layers–>Adjustment Layers). In doing so, you apply these imaging changes not directly onto the surface of the base image, but on a layer sitting atop that base (or, background layer). This provides protection to the original image, since you’re not altering the image itself.
The best part is that you can build layer on top of layer as you fine-tune your image. When it’s all done and looks like you want it, you can then flatten it into one file and save that file. One hint: it’s a good idea to save a version of both your layered file–so that you can return to it and tweak individual layers later if needed–and the original file (because it’s good practice to always keep the unaltered original file).
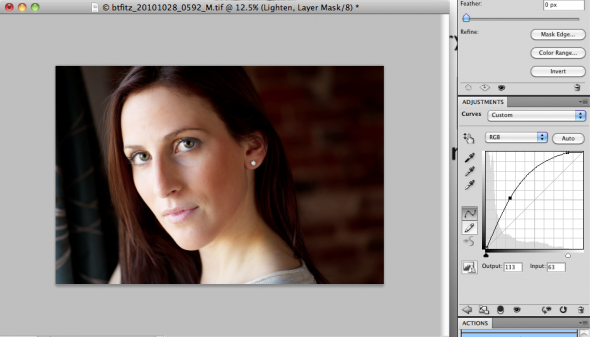
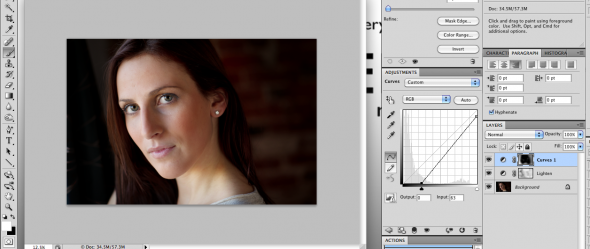
There’s one other advantage to using Adjustment Layers: the ability to use your brushes to add and deduct your adjustments to highly-defined areas of your image. Here’s how that works. After you’ve made a new Adjustment Layer (say, Curves), given the layer a name and then done the adjustment, you’ll probably find that the adjustment you just made looks great for one portion of the image but not another. If, for example, you’ve lightened the entire image but now find areas of the subject’s face are too light, it’s simple to fix. Just go to the Photoshop Toolbar and go down to the bottom, where there are two colored, overlapping boxes used for setting foreground and background colors. Make sure they show one black square and one white square. If they don’t click the small black and white box icons above them. Then select the black box by clicking the double-arrow icon between the squares until the black box is above the white box. Next, go to the paintbrush icon in the toolbox. Make sure the diameter of the tool is appropriate for the area you are going to paint–in this case, the areas of the face you want to darken. Then click the mouse while holding the brush over these areas. You’ll see them getting brighter. What’s happening is that the black brush is selectively removing the adjustment you made earlier. To add it back, click the arrow in the toolbar so that the white box is now on top, or selected. Now paint again over the same area, and it will darken.
Once you get the hang of it, adjust the size and opacity of the brush in order to add or remove adjustments you’ve made from select portions of the image. If you’re not good at staying in the lines, you can always go back and forth (black box and white box) in order to fine-tune things.
With a little practice, you’ll quickly become a fan of the Adjustment Layers -toolbrush combo. If you haven’t been doing it, it’ll save you time and frustration–and will result in better image adjustments. So remember–think in layers.


